Supplies & Demand
Continued from Part 1 / Part 2
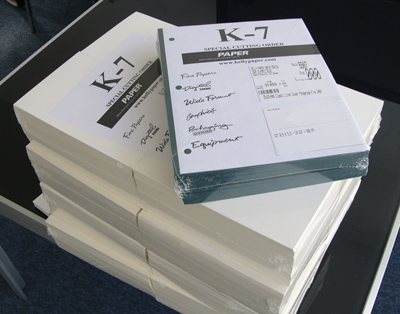
What do you need to make 150 calendars made of 14 cards each? Why, 2100 blank cards, of course!
I’m fortunate to have a wonderful paper store right in my neighborhood — Kelly Paper has some of the nicest, most knowledgeable staff around, and I love going in there and browsing their huge aisles full of paper stock. They also have overnight cutting services, so once I found the paper I wanted for this year’s calendar (a forest-green laid correction: linen for the covers and a natural-white linen for the interiors), I just told them how many sheets I wanted at what size, and they had it all nicely packaged and ready for me the following morning.
Also, I did the math wrong and ordered twice as much as I needed! THAT IS OKAY. I can always use nice paper for something. Maybe I will start doing daily sketches. It could be a New Year’s resolution.
BUT I GET AHEAD OF MYSELF
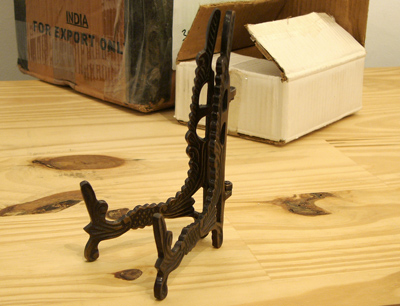
I also need easels! Two years ago, when I got the first batch of easels, I looked at a lot of styles before settling on this one — they’re bronze, hand-made in India and finished in either this dark coppery color, or in antique gold or pewter. They’re super-handsome, and all three colors go equally well with the rich palette of the calendar. I’ve toured the local office of the manufacturer/importer and spoken with the head dude in the U.S., and he explained how a portion of the proceeds from their easels go towards scholarships for kids in New Delhi. I am okay with that!
Perhaps by now you are getting a sense of how particular I am about every facet of this process? It’s why I’m sure you’ll be pleased with the calendar — because every dang piece of it has to pass through my super-fine high-mesh perfectionist-filter before I am satisfied. It makes for a tense existence but wowsers does the stuff come out excellent.
Next, it’s time to stock up on supplies for the ol’ GOCCO printer:
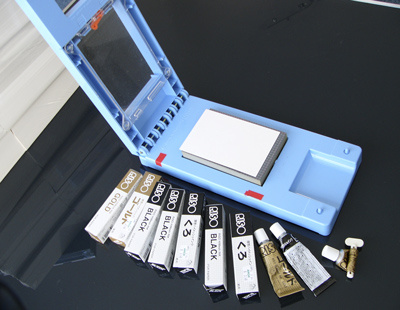
If you’re not familiar with Print GOCCO, it’s a Japanese screenprinting apparatus, popularized in the 1980s, that has since has been embraced by the modern crafting community. It’s easy to use and produces really cool, artisanal work — much more interesting than a computer printer can create, without being as complex or expensive as letterpress. You can read more about the history of GOCCO here!
The GOCCO uses several expendable supplies: ink, screens, and bulbs (used to create the screens). The screens and bulbs look like this:
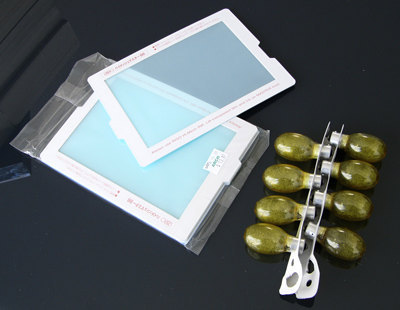
Each screen is a fine mesh mounted on a cardboard frame. Typically the way it works is:
• You draw or print out your image.
• You make a photocopy of the image (to reduce it to pure black-and-white, and also there’s something special about copier toner that’s reactive with the screen).
• You place the photocopy and a blank screen inside the GOCCO and expose them to heat using the bulbs.
• The heat burns through a coating on the screen at the point of contact with the toner.
• Your screen is now “imaged” and ready for printing. When ink is pressed against the screen, it’s forced through at the burned areas, and makes an inked impression in the shape of your design.
Here’s a video I made a couple years ago showing some of that process.
So! All good, right? Wrong. See, the Japanese factory that manufactures the screens and bulbs has closed down due to the rising cost of materials and falling Japanese demand for the supplies! This has created a frenzy in the GOCCO community, and it’s made screens and bulbs hard to come by and expensive. Since we use 38 different screens for our calendar (plus mess-ups), and each screen requires spending two bulbs, this scarcity nearly sunk the project this year. (Thankfully the inks are still plentiful — for the moment at least.)
But never underestimate the cleverness of crafters! Folks have realized that there is an alternate way to image these screens: by feeding the coated mesh through a thermofax machine, which can “print” onto a screen using heat in the shape of a given design! HOW CLEVER. This handily eliminates the need for bulbs at all.
The screen fed through the printer must be loose and unmounted (on a roll), so it’s also necessary to mount the screen to frames that will fit the GOCCO. A crafter named Amy first tried doing so with cereal box cardboard, until discovering that an enterprising German fellow has started manufacturing reusable plastic frames specifically for this purpose!
Here is the takeaway business lesson: Find a niche of obsessive hobbyists that needs some goofy, super-specific thing that nobody else is bothering to provide, and provide it.
Because I wasn’t about to buy a thermofax machine, I contracted Amy to print my designs onto screens for me, and mount a small set of them onto the reusable frames. She did a great job! Here’s what they look like:
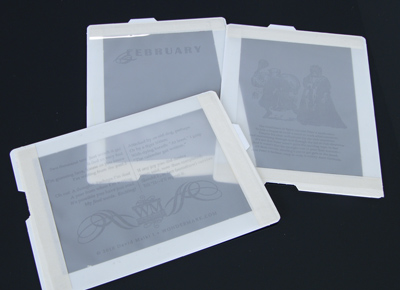
This was a much easier process than burning through hundreds of dollars’ worth of screens and bulbs at home! And I feel better about the lack of waste that the process generates, too. It does mean that everything I sent her to print had to be perfect, and it does mean that there is some messy, inky cleaning involved in re-using the frames, but those have proved to be very manageable concessions.
As described in Part 2, each card requires three separate screens — one each for the calendar grid, month title, and image/verse. I vectorized each illustration using Cocoapotrace so I could send Amy a PDF with 100% vector images — never having used the thermofax process before, I wanted to make sure we’d get the cleanest possible prints. I’m happy to report that they all turned out great!
This amassing of supplies — just the mechanics of choosing and ordering the paper, ordering the ink, having the screens made, etc. — takes a week or so, but once it’s all done, all that’s left to do is PRINT.
And that’s what we’re going to do — in tomorrow’s post!
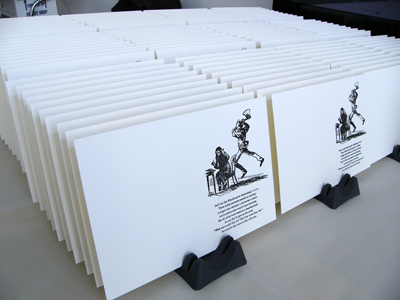
Tomorrow: Part 4: Print That Baby
OBLIGATORY PLUG: Buy the calendar here!

Excellent — thanks for all the Gocco information! I’d been thinking of just getting a Speedball kit, but knowing that Gocco is somewhat still available… it may be worth a try.