Last weekend, I made some spoon hangers for my kitchen!
Here is how I did this seemingly impossible task.
In our kitchen, we had a large ceramic crock to hold cooking spoons, tongs, and other large utensils. It was a mess!
Stuff was always spilling out, and whenever we’d get a new spatula or something, we’d have to shove it in there with everything else, and the stuff at the bottom would get all gross. OSHA even cited us for it, once.
When I noticed that every utensil (of course) has a hole in the handle, I decided to figure out how to hang the most commonly used pieces in a more accessible place, such as the side of a cabinet, which otherwise is just wasted space which is unacceptable.
We already do something similar with pots — we have a length of chain screwed along the wall, and we hang pots and pans from the links, using metal S-hooks. (The chain also comes in handy if our kitchen ever gets too icy to drive in safely.) So I figured there was probably a way to do something similar with utensils.
I Googled around to see how other people had solved this problem. The best tutorial I found recommended mounting bath towel bars, and hanging S-hooks from them. But the links in that article (to specific products at Ikea) were all expired, and those products weren’t offered anymore.
No matter. I don’t need to buy anything to make this happen!! We’ve fabricated all kinds of weird things at our new studio — it’s the type of place where, rather than buy a four-dollar toilet paper holder, I designed a version for my office roommate Jason to cut out of wood with his laser.
It took ten times the amount of work as screwing in a store-bought piece of plastic, but we made it, doggone it, and I point it out proudly to all our visitors.
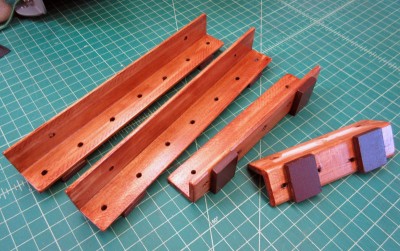
As I was looking through some old scrap material, I realized I already had something that would work perfectly well for the kitchen: strips of wooden corner moulding.
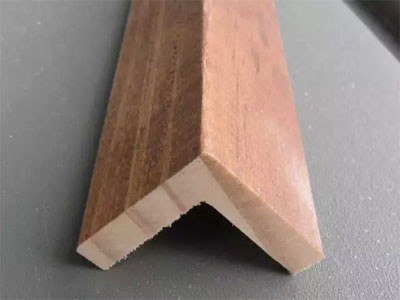
I forgot to take a picture before I started, so this is a GENERIC IMAGE. This stuff is super cheap, though — a buck and a half per foot at Home Depot. Or, free, if someone leaves some behind after finishing some other job! As I think happened here!
I found a few scraps about a foot long each. I trimmed them to the size that would fit our cabinets, then measured out and drilled holes about an inch and a half apart.
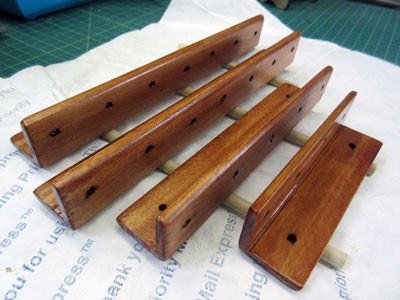
The idea is that one side will be screwed into the cabinets, and the other will have a bunch of hooks dangling from it. The picture above shows them post-drilling, drying from a coat of stain. (Please don’t tell USPS I’m using a Priority Mail™ mailer for something other than mailing a Priority Mail™ shipment! The moisture-resistant Tyvek ensures any spilled stain doesn’t soak through to the tabletop.)
As I was drilling some of the holes, one piece of the wood threatened to split along its length. That wouldn’t do, so I cut some 1″ × 1.25″ pieces of 1/4″ MDF scrap and painted them brown.
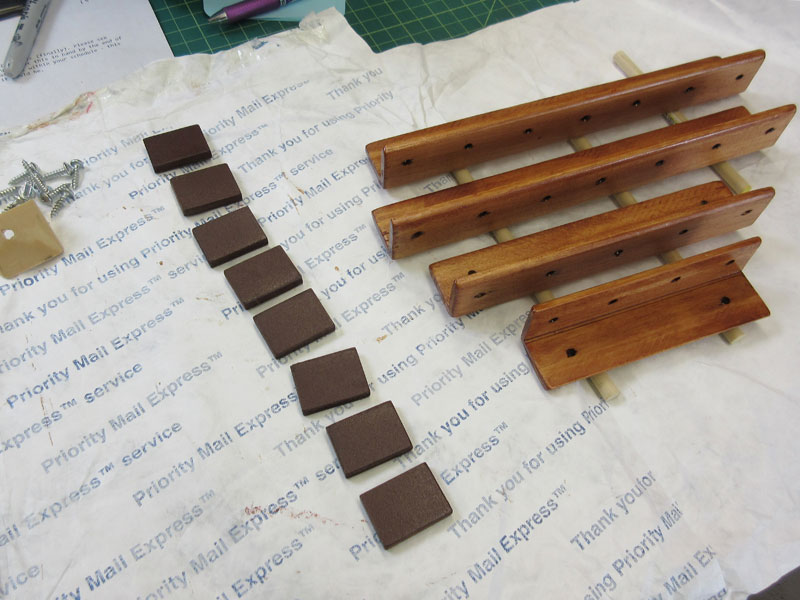
Once the stain was dry, I glued the MDF pieces to the underside of each rail, flush with the side that would be mounted to the cabinet.
Since MDF is a composite material with no grain, and it’s really dense, this bracing should keep the wood from splitting, and also transfer into the wall any weight or downward pressure felt by the outer edges of the rail.
I mean, sure, these things are designed to hold incredibly lightweight items, but better safe than sorry — or as I like to say, better complicated than simple.
This is not always a good philosophy but it ends up kinda...happening a lot.

Jason’s work involves gluing stuff together all day every day, so in his bag of tricks I found these: backwards clothespins. They’re just regular clothespins in which the wooden pieces have been flipped upside down, and because this arrangement puts more tension on the spring, they hold super tightly. INCREDIBLE.
After drying the glue, a second coat of stain, and a coat of lacquer, they’re ready to hang! Luckily, our cabinet sides are solid plywood, so it was easy to screw directly into them.
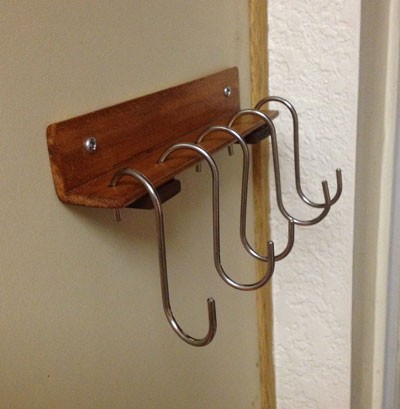
The S-hooks came in a pack of 20 from Amazon. (OK, so I did have to buy something…but those convention-standard pipe-and-drape hooks would work just as well. So, start pocketing them next time you’re at Comic-Con.)
My search terms on Amazon were “the cheapest price for the largest package of entirely passable hooks which will be required to do very little work, and, if possible, can the item title be 37 words long?” Here is the result. They’re totally fine.
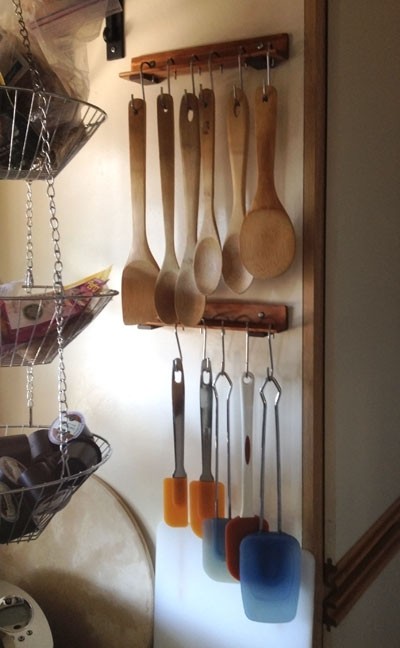
We mounted four of these rails on two different cabinet sides, and they work great! The bar for their performance was very low and they cleared it easily!!

Since the S-hooks are kind of wide, the spoons hang out from the wall a couple inches, in open air. This meant we could actually overlap things — as you can see in the above picture, the lower rail is actually mounted on the wall behind the longest spoons. So it’s possible to save some vertical space!
I dub this a SIMPLE PROJECT that is PRETTY HANDY. I get immense satisfaction from creating simple solutions to small problems! If you do it yourself, I hope it works as well for you, and makes you feel this alive.
Friends, I’ve come to the end of this post, and I just now realized I forgot to follow DIY Article Best Practices, and make it a 20-page slideshow in order to optimize ad views. I hope you can find it in your hearts to forgive me.